What does Epsom salt do to tree stumps?

Keenan Riddell • November 15, 2022

What does Epsom salt do to tree stumps?


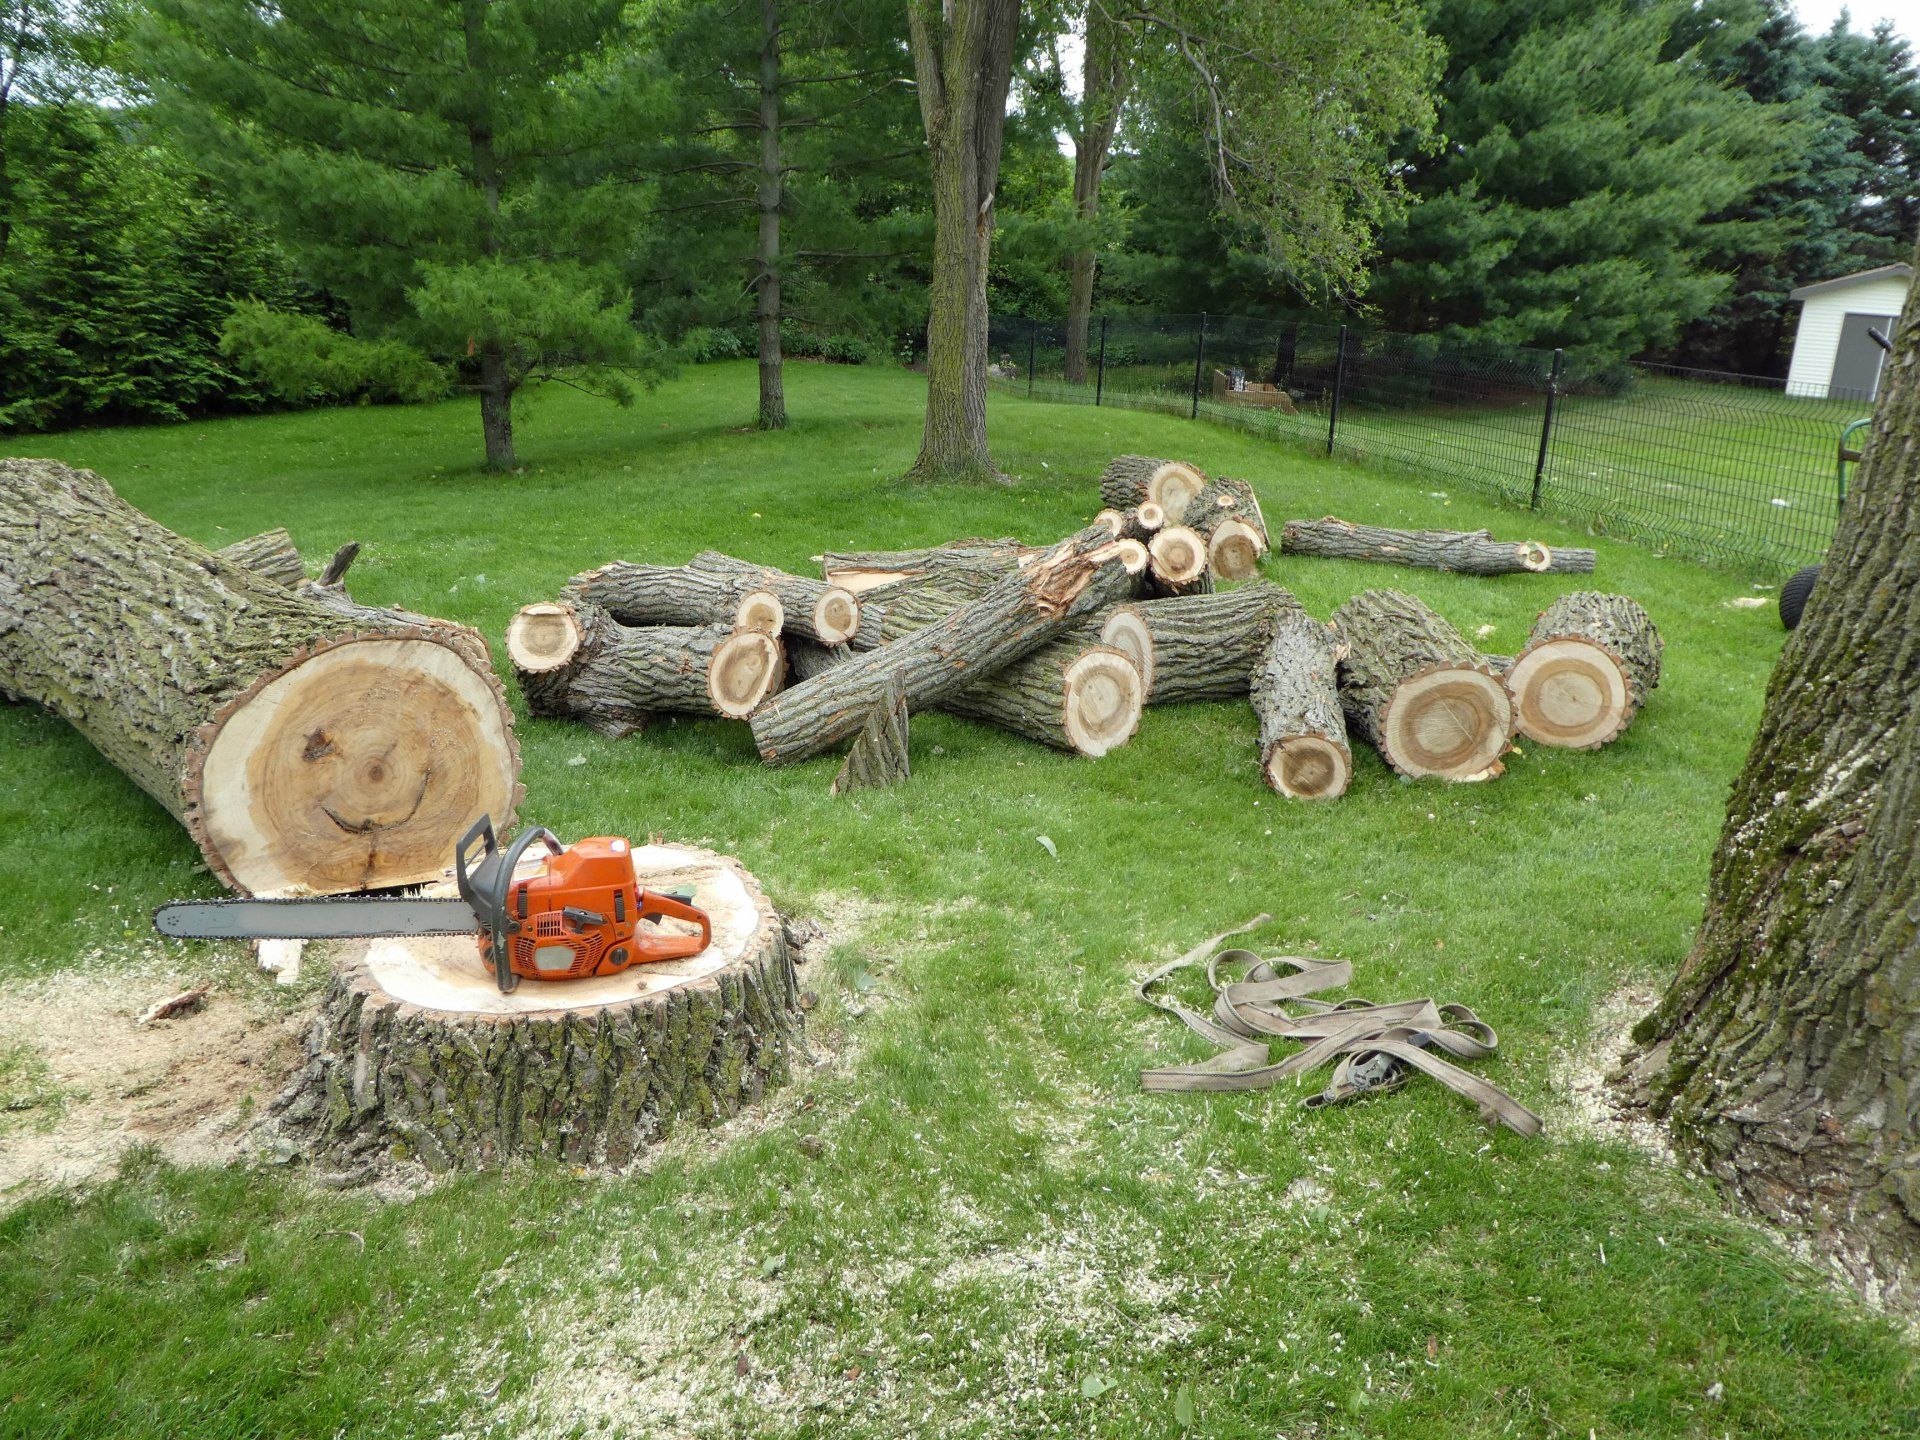
If you’ve ever had to remove a tree in your yard, you probably have a stump remaining. Stumps can be unsightly and take up space for a long time. Fortunately, there are many ways to get rid of them so they don’t take up unnecessary room. Epsom salt is a great solution because it’s an affordable and natural way to give your yard a new look. Here’s why, and how, you can use Epsom salt to help you get those unwanted tree stumps out of your yard permanently.


What is Epsom salt?


Epsom salt, also known as magnesium sulfate, is a naturally occurring mineral compound used in a variety of home and medical applications. The word “Epsom” refers to Epsom in Surrey, England, where the presence of mineral springs containing magnesium sulfate was first documented in the year 1618. Almost everyone has heard of Epsom salt for its use in baths, but you can also use it for many other purposes. Epsom salt is very useful for trees because it has a high concentration of magnesium. Trees thrive on a healthy supply of magnesium because it can help prevent disease and pests, resulting in bigger and more plentiful crops. It can also help trees grow more quickly. Epsom salt is also a source of sulfates, which are important to plant growth.


How does Epsom salt help remove tree stumps?


Magnesium is the key. The Epsom salt acts as a fertilizer to help the stump decompose more quickly. The stump will likely be gone in a few months. With the help of the Epsom salt, it will decompose faster. The stump will be gone before you know it. Epsom salt is a natural product that is safe for the environment and for your trees and plants. It can be applied without any side effects or hazards to humans or the environment. Using Epsom salt on your tree stumps will end up giving you a healthier and better looking yard.


How to use Epsom salt to get rid of tree stumps?


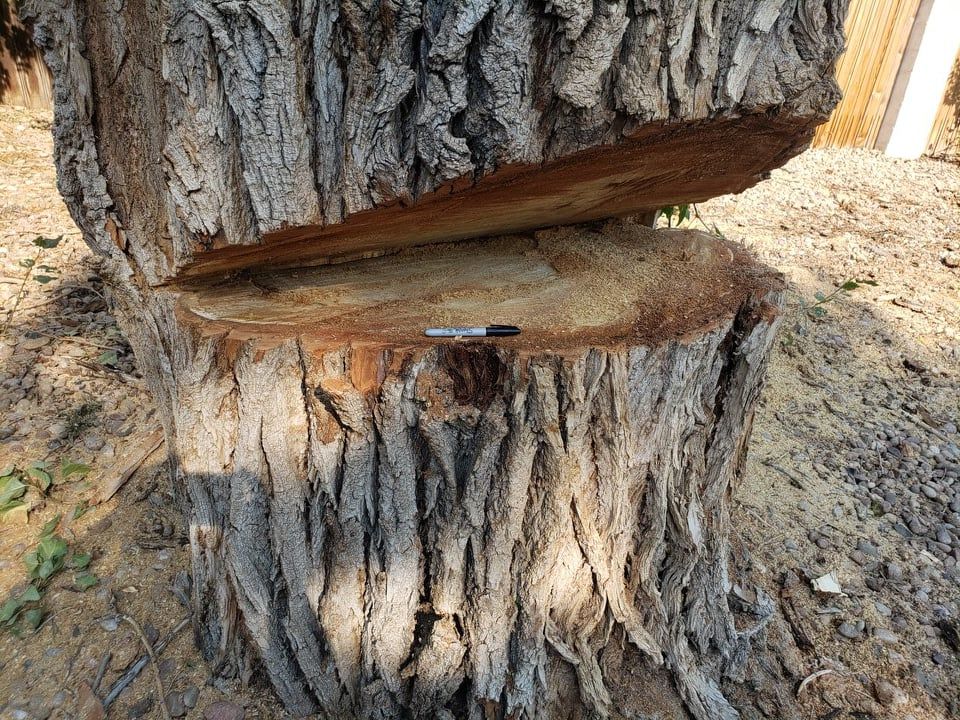
First, you should make sure that the stump is completely dead. You can do this by digging up the stump and making sure that the inside of the stump is completely decayed. If there is any part of the stump that is still green, you will have to keep watering it with the Epsom salt. Once you’re sure the stump is completely dead, you can sprinkle Epsom salt around the stump. Be careful not to put it directly on the stump because it can cause it to decompose even faster. You can sprinkle it around the stump every couple of months. This will help it decompose more quickly and make your yard look better.


Other benefits of using Epsom salt on tree stumps


There are many other benefits of using Epsom salt on your tree stumps. Once the stump is gone, your yard will look a lot nicer and have more space to add new plants or trees. Since the stump will have been taken care of by the Epsom salt, you won’t have to worry about it. This will lessen your work load and make for a nicer yard. You can use the area where the stump was to add more plants or trees, or you can use it for other purposes. Using Epsom salt on your tree stumps is a great idea because it is eco-friendly, chemical-free, and easy to do. You don’t have to spend a lot of money on chemicals to get the same effect.


Limitations of using Epsom salt to get rid of tree stumps


Like with anything, there are also some limitations to using Epsom salt to get rid of tree stumps. Since the stump is being fed by the Epsom salt, you will have to keep feeding it to keep it alive. If you don’t feed it, the stump will die off. You will have to keep adding Epsom salt to the stump to keep it alive. This means you might have to water your stump a few times a week. This can become a hassle, especially during the hot summer months. If you have a large tree stump you have to deal with, it might take a very long time for the stump to decompose. It all depends on the size of the stump. The larger the stump, the longer it will take to decompose.


Conclusion


Epsom salt is a great natural product that can help remove tree stumps. It is chemical-free and safe for the environment. It is also very affordable. You can use Epsom salt for many other things like relieving joint pain and softening your skin. It’s a great product that you should keep in your home. Epsom salt has a lot of benefits, not only for your trees, but also for people. So don’t forget to add it to your shopping list when you go to the store!


By Keenan Riddell November 15, 2022
Will the stump grow back after grinding? ‍ Grinding stumps is a common practice in forests and wood lots. Depending on the size of the stump and surrounding soil, it can take anywhere from a few months to a few years for the stump to grow back. Grinding a stump removes its ability to sprout new shoots because it removes all of the above-ground biomass—the nutrients, leaves, stems, and roots that are necessary for regrowth. Grinding also exposes the stump’s cambium layer so that sunlight can hit it directly; this prevents new shoots from growing out of the side or underside of the stump and speeds up decay by exposing more surface area to UV light and moisture. The amount of time it takes for a grinding operation to pay back depends on many factors, including tree species, location, volume cut from an individual tree, stand age, clearcutting vs. leaving stumps, soil moisture conditions after grinding, etc…That being said... Why does it take so long for stumps to regrow? It’s important to understand that stumps are living organisms that have a set growth cycle. Innately, a tree’s goal is to survive and reproduce. When a tree is cut down, it goes through a series of events that lead to its demise. As the tree is cut down, its leaves go from absorbing CO2 to producing CO2. The tree’s leaves and stem are full of chlorophyll, the green pigment that is essential to photosynthesis (the process in which trees convert sunlight and CO2 into energy). Once cut, the chlorophyll in the leaves degrades and the CO2 is released into the atmosphere. As the stump decays, water is absorbed by the remaining stump and is transpired into the atmosphere by the stump’s leaves. In the first few weeks after the tree is cut down, the stump will lose a massive amount of water through the stump’s cambium layer. The cambium layer is the layer of the stump that produces new cells for the tree. As these cells die, the stump’s cells are decomposed by microbes. After the first few weeks, the stump will retain a large amount of water. How can you tell if a stump has been ground? A stump that has been ground will show signs of decomposition, like a rotting smell and dark discoloration of the stump. A freshly ground stump will smell like fresh sawdust and will be moist to the touch. Once the stump has decomposed to the point that it has lost its green colour, it has been ground. The stump will be light brown to grey in colour and will be dry to the touch. If the stump is ground, you will also notice that the stump has been sawn off a few inches below ground level. Why is it important to know if a stump has been ground? Knowing if the stump has been ground will determine how quickly the stump will decay and if you have the potential for a regrowth issue. If the stump is ground, the amount of time it takes for the stump to decompose depends on the stump’s size and the surrounding soil conditions. What will happen to my soil after grinding? When a stump is ground, it will add organic matter to the soil and increase the amount of water and nutrients that leach into the soil. The decomposition process uses the stump’s carbon, nitrogen, and other nutrients in order to breakdown the sawdust and leaves that are inside the stump, which are then leached into the soil. This can cause a minor (and short-term) increase in the soil’s pH level, which is generally considered a good thing for forest soils. What happens when the stump starts growing again? Once the stump has decomposed below a certain level, new shoots will grow, depending on stand age and species. The younger the stand, the more likely it is for regrowth to occur. There is less risk of regrowth if the stump has been ground and has decomposed down to the cambium layer. If the decomposition process has reached the cambium layer, then the stump will not be able to regrow because it has no leaves to absorb CO2. If a stump is chopped off at or above the soil level and it has not been ground, it will regrow. Can we use the stump for anything after it grows back? Once a stump regrows, it can be used for a variety of things, such as harvesting sawdust, burning, or using the stump as a living stump for a new tree. If a stump has been ground and chopped below the cambium layer, it can also be used for a living stump. The stump will be unable to heal itself and grow into a new tree, and any cuts you make in the stump are likely to remain open because there is no cambium layer to seal the cuts together. If there has been no other disturbance in the vicinity of the stump (i.e. there is no other harvesting activity nearby) then the stump can be used for a living stump to grow a new tree (pending species, site conditions, etc). What is a living stump? A living stump is a stump that has been left in the ground and undisturbed long enough that it seals itself, as all healthy trees do naturally by closing off the vascular tissue of the stump. This stump will look like a normal tree with bark, branches, leaves, etc that is growing out of the ground. A living stump can be used to store carbon and help regulate soil temperature, moisture, and nutrients. How do stumps regrow? When the stump is chopped off at or above soil level, the stump’s vascular tissue remains intact. This vascular tissue is the network of vessels that transports water and minerals up and down the trunk. The vascular tissue is what closes off the vascular tissue from the stump. When this tissue is exposed to air, it dries out and closes off the stump. When the vascular tissue closes off, the stump is unable to transport water and minerals up and down the trunk. This is why stumps can’t grow new shoots above soil level. How long does it take for a stump to regrow? Depending on the species and the size of the stump, it can take anywhere from a few months to a few years for the stump to regrow and be ready to be harvested again. If the stump has been ground, it will take longer to regrow because the stump has decomposed down to the cambium layer, where the vascular tissue is located.
By Keenan Riddell November 15, 2022
What happens to roots after stump grinding? When you have a tree removed from your property, stump grinding is often the best way to remove it. Stump grinding removes the stump and ground around it, leaving little trace that a tree was ever there. However, it’s important to think about what will happen to the roots after they are ground. If you don’t take measures to protect them, the roots can cause a variety of issues for your property. Here are some reasons why you should protect those roots after stump grinding. Why is it important to protect stump grinding roots? After the tree is removed from your property, the ground around the stump is often excavated and then ground up. This process is called stump grinding, and it’s a common way to remove tree stumps. After the stump is ground, any remaining roots are vulnerable to damage. The stump itself may be completely gone, but the remaining root system can cause a variety of issues for your property. Stump grinding roots pose a threat to the health of your lawn. The roots can rob your lawn of nutrients and water, and they can also cause soil compaction. This can lead to wilting and yellowing of the grass. The roots can also pose a threat to your water supply. Roots can infiltrate the water supply, and they can clog the sewer lines of your home. If you don’t protect stump grinding roots and they run into a gas line or water line, it could cause a major setback on your project. Reasons why you should protect the grinder cuts If you don’t take measures to protect the roots after stump grinding, they can pose a number of issues for your property. If you have a gas line or water line that runs under the tree stump, the roots can infiltrate it. The roots can also cause soil compaction, which can lead to poor water and air flow. They can rob the soil of nutrients and take up water that your lawn needs. If you have a septic system, the roots can clog up the lines and lead to backups. The roots can also pose a tripping hazard. They can get caught in shoes and cause you to lose your footing. How do you protect those roots? There are a few ways that you can protect the roots after stump grinding. One of the best ways to protect the roots is by installing a catch basin. A catch basin is basically a hole in the ground. You can excavate the soil around the roots, and then you can put the soil back in the hole to form a basin. You can create a basin by digging a hole around the site where the roots are and filling it with soil. The surrounding soil will help protect the roots from damage. Another way to protect the roots is by installing root barriers. Root barriers are basically strips of a vinyl material that you install around the site where the roots are to protect them. Root barriers work well around gas lines and water lines. If you don’t want to install a root barrier, you can also protect the roots by mulching them. It’s important to wait to mulch the roots until after they’ve been ground. Otherwise, you could be covering the grinder cuts and making them harder to see. Installing a catch basin One way to protect the roots after stump grinding is by installing a catch basin. A catch basin is basically a hole in the ground. You can excavate the soil around the roots and then put the soil back in the hole to form a basin. You can create a basin by digging a hole around the site where the roots are and filling it with soil. The surrounding soil will help protect the roots from damage. You can dig out the soil around the site where the roots are and then put the soil back in the hole to form a basin. The surrounding soil will help protect the roots from damage. You can create a basin by digging a hole around the site where the roots are and filling it with soil. The surrounding soil will help protect the roots from damage. Installing root barriers Another way to protect the roots after stump grinding is by installing root barriers. A root barrier is basically a strip of a vinyl material that you install around the site where the roots are to protect them. You can install root barriers around gas lines and water lines to protect them from the roots. You can also use root barriers to prevent the roots from spreading further around your property. Root barriers work well around gas lines and water lines. You can install root barriers around the site where the roots are. Mulching the roots Another way to protect the roots after stump grinding is by mulching them. It’s important to wait to mulch the roots until after they’ve been ground. Otherwise, you could be covering the grinder cuts and making them harder to see. You can mulch the roots after stump grinding by putting an inch of compost or mulch around the site where the roots are. Mulching the roots will help prevent them from taking up water and nutrients from the soil. It will also help prevent the roots from spreading further around your property. Conclusion After the tree is removed from your property, the ground around the stump is often excavated and then ground up. This process is called stump grinding, and it’s a common way to remove tree stumps. Stump grinding removes the roots and ground around the stump, leaving little trace that a tree was ever there. However, it’s important to think about what will happen to the roots after they are ground. If you don’t take measures to protect them, the roots can pose a variety of issues for your property. There are a few ways that you can protect the roots after stump grinding.
By Keenan Riddell November 15, 2022
What happens if you don't grind the stump? When you play baseball, there are rules. This might seem like a silly point to make, but for any game with multiple rules and regulations, there’s always one person who manages to break all of them at once. Consequently, the baseball field is peppered with numerous ground rules, which dictate what players can and can’t do while on the field. These ground rules are in place to keep the game fair and as safe as possible for all players. These rules come into play almost every time there’s an inning played between two teams. It doesn’t matter if it’s preseason or regular season; if you don’t follow the ground rules, you won’t get very far before getting called out by your teammates. Stump-the-Runner Rule In the batter’s box, the runner is out if he misses the pitch and doesn’t attempt to advance to first base. This rule is in place to prevent runners from sitting on the pitch and, by extension, to get more runners to attempt to advance to first base. The rule is simple and straightforward, though the batter does have a grace period of one pitch to advance to first base. After that, he’ll be called out. The batter must attempt to advance to first after missing a pitch, or he will be called out. If a batter fails to do so, he is considered to have not attempted to advance to first base and will be declared out. It’s important to note that this rule applies to all batters, even pitchers. Basepath Ground Rules The runner must always stay inside the baseline. If he strays from it, he will be called out. The baseline is the imaginary line that runs parallel to home plate and extends from foul line to foul line. As long as the runner stays on the right side of this line, he won’t be called out. If he steps over the line, though, he’ll be called out. If a runner is distracted while rounding the bases, he might end up stepping outside of the baseline. If he does, he is out, regardless of the reason. At all times, the runner must stay inside the baseline. If he steps outside the line, he will be called out. Batter’s Box Rule The batter must remain in the batter’s box throughout his at-bat. When he steps outside the batter’s box, he will be called out. This rule is in place to keep the batter in a box, both physically and figuratively. As with the other rules, this one only applies when there is a runner on first base and no outs. When there are no runners on base and one out, the batter can leave the box and go wherever he wants. A batter must remain in the batter’s box throughout his at-bat. When he steps outside the box, he will be called out. Batting Practice Rule The batter must remain inside the foul lines while he hits batting practice. If he steps over the lines, he will be called out. Batter’s hitting practice is a common baseball tradition. When the team is taking batting practice, the batter will hit a few balls off a tee or off a soft toss machine. This is usually done at the beginning of the game, sometimes before the team even arrives at the field. This rule is in place to prevent batters from going too far down the field and straying off the baselines while they hit. It’s designed to keep them on the field and prevent them from getting in the way of other players. When a batter steps over the foul lines while hitting practice, he will be called out. Base Coaches’ Box Rule Base coaches cannot step inside the box during an inning. This rule is in place to keep coaches from endangering themselves and others (especially runners). When a base coach steps inside the box, he is considered “actively participating” in the game and will be called out. Base coaches must remain outside the box at all times. If a coach steps inside the box, he will be called out. The box is the area between the first and second base lines extending halfway between home plate and first, second, and third base. If a base coach steps inside the box, he will be called out. Runner Going From 1st to 2nd A runner can attempt to go from first to second base only when there’s a single, a walk, or a hit-by-pitch. When there are two outs and a runner on first, he cannot attempt to steal second base. When a runner goes from first to second, the batter must make an attempt to swing at the ball. If he fouls the ball or misses the ball completely, the runner will be called out. If the batter makes contact with the ball, the runner will be safe and will not be called out. If the batter goes to the base coaches’ box and misses the ball, the runner will be called out. If the batter is swinging at the ball and misses it, the runner will be safe and will not be called out. Runner Going From 2nd to 3rd To go from second to third base, a runner must be able to get to third “safely.” This means that he must be able to beat the throw from the first baseman without the first baseman tagging him out on the way to third. If the runner has two outs and the first baseman fields a hit and throws the ball to third base, the runner will be called out. If the runner has two outs and the first baseman fields a hit and throws the ball to second base, the runner will be safe. When a runner is attempting to go from second to third base, the batter must go to the base coaches’ box and attempt to swing at the ball. If the batter fouls the ball or misses it completely, the runner will be called out. If the batter makes contact with the ball, the runner will be safe and will not be called out.  Bottom of the Game: Runners at 2nd & 3rd, No Outs If there are two outs with runners on second and third base, one of two things will happen: The batter will make contact with the ball and either: - Hit a single, walk, or hit-by-pitch. The runner on third base will advance to home plate and the runners on second and third will remain at second and third. - Miss the ball and the runners on second and third will remain at second and third. - Make a bad throw to first base and the runner on third base will score and the runners on second and third will advance to first and second. If the runner at third base is trying to steal home and the batter hits a single, walk, or hit-by-pitch, the runners on first, second, and third will attempt to score. The runners on second and third will attempt to score only if the runner on third can get home “safely” and without being tagged out. Conclusion When baseball players are on the field, there are a lot of rules to keep in mind. The rules keep the game fair and safe for everyone, and they also help players better understand the game. When you know the rules, you can understand your teammates’ decisions and react accordingly. You can also call out other players who are breaking the rules, which makes the game that much more fun.
By Keenan Riddell November 15, 2022
What is the fastest way to get rid of a tree stump? When you cut down a tree, your yard probably looks strange for a little while. What was once an open area is now filled with a stump and some leftover tree stumps. While you may like the look of your property, these stumps can also be quite annoying. They can be a hazard to anyone that enters your property, they can be an eye sore if you are trying to sell your home in the near future, or they might just get in the way when you are mowing the lawn. Thankfully, there are several ways to get rid of them! Within this article, we will go over different ways to get rid of tree stumps. Some methods work better than others depending on what type of stump you have and how much time you want to invest into removing it from your yard. Decide on Your Final Stump Location The first thing you should do when trying to get rid of a stump is to decide where you are going to dispose of it. If you are just getting rid of one or two stumps, you can get rid of them in a landfill. However, if you have a large amount of tree stumps to remove from your yard, it may be more cost-effective to hire a landscaping company to come and remove them for you. If you are removing a stump from your home, you might want to consider removing it completely or cutting it into pieces. The stump will decay more quickly if you cut it up into smaller pieces. You can then either put the pieces in the lawn or they can be placed in the corner of your yard or near your home as decoration. Using an Axe to Remove a Tree Stump The simplest and cheapest way to get rid of a stump is to use an axe. Using an axe to cut down a tree stump does not always work, but it is worth a try. If you are trying to remove a small stump, you may just be able to chop it off with an axe. However, larger stumps may require a more advanced method. Using an axe is often the first method people try, but it is important to wear protective clothing and shoes when attempting this. To use an axe to remove a stump, you need to cut the stump from both sides, so you will need to find the middle of the stump first. Using Lime to Rot Rotting Stumps If you have a stump that is already rotting, you can try to speed up the process by using lime. This will help the stump to rot faster and you can then remove it easier. This is most effective on very small stumps, so it is best if you want to remove a few smaller stumps. For larger stumps, this is not really an effective option. You will need to pour lime into the top of the stump and then water it regularly. It can take a few weeks to notice any difference, but it is a safe, cheap method. Using a Chipper to Get Rid of Stumps If you want to remove a large stump with a lot of wood on it, a chipper might be the best option. A chipper can quickly remove large amounts of wood, which allows you to then dispose of it in a number of different ways. If you have a large stump in your yard, you will most likely need to use a chipper. You can also use a chipper to get rid of smaller stumps, though it will take longer. Chippers are usually quite large, so it might be difficult to transport the wood once the stump is removed. You may want to consider investing in a smaller handheld chipper for smaller stumps. Using a Chainsaw to Remove Stumps If you are trying to remove a small stump, you can use a chainsaw to chop it off. This is a good option if you do not want to invest in a large piece of equipment and need to remove a small stump. If you are using a chainsaw to remove a larger stump, you will want to be careful to not accidentally chop a limb off the stump that you do not want to cut. Conclusion When you cut down a tree, it creates a lot of extra work. You have to remove the stump and any leftover tree stumps, as well as replace the tree that you previously had. Getting rid of the stump is one of the easiest things to do. You can cut it down with an axe, or you can chop it up with a chainsaw. After you get rid of the stump, you will notice a big change in your yard. It will look much nicer and be much safer for everyone that visits your property.
By Keenan Riddell November 15, 2022
Should I remove a tree close to house? Trees are great additions to your home. They reduce stress, increase property value, and provide you with a constant source of fresh air and beautiful scenery. But they can also be hazardous if they are too close to your house. That’s why it’s important to know how to remove a tree safely and responsibly. If you have a tree that’s too close to your home, the roots may cause structural damage or the branches may grow too big for the space. If this is the case for you, consider these tips on how to remove a tree safely and responsibly. However, keep in mind that removing a tree from your property can have negative consequences as well. Destroying a habitat isn’t something anyone should do lightly, so make sure you understand all the potential risks before making this decision. Assessing the safety risk There are a few ways to tell if a tree is too close to your house. First, if you notice that the tree is too close to your roof, you may want to remove it. The roots of nearby trees can cause significant damage to your roof by growing into it. This can lead to leaks and other serious issues with your home. Additionally, branches may grow too close to your electrical lines, which can pose a safety risk. If a branch grows too close to your house, it can fall on your home during bad weather and cause serious damage. Roots can also grow into your plumbing and cause serious issues with your system. Hiring a professional to remove a tree If you determine that the tree close to your home is too close, you may want to hire a professional to remove the tree. A professional arborist can remove the tree in a way that’s safe for your home and for the workers. You may also want to hire a professional if you aren’t sure how to safely remove the tree yourself. If you don’t have any experience, you may want to let a professional handle the tree removal. Professionals have the required training, knowledge, and tools to complete the tree removal safely and effectively. If you hire a professional, make sure they use appropriate removal techniques. Only use the recommended removal method for the size and species of the tree. Never use an aggressive method that will put your home at risk. By yourself if you’re certain it’s safe to do so If you want to remove a tree that’s too close to your home, you may be able to do it yourself. This, however, depends on the size of the tree and the species it belongs to. The best way to determine which tree you can safely remove is to know the species. You can find this information in an arborist handbook or online. The Arbor Day Foundation also offers a guide that can help you identify the trees on your property by species. When removing a tree by yourself, you’ll want to make sure you plan the tree removal carefully. Ensure that you have all the necessary safety gear, including a hard hat, goggles, gloves, and a utility knife. You’ll also need a safe way to get the tree off your property. This may include getting a stump grinding service or renting a log splitter. Be cautious when removing large trees by yourself If the tree you want to remove is too large to safely remove by yourself, you may want to reconsider your decision. Removing a large tree from your property could have serious consequences for your home and for your neighbors. If a large tree falls on your house, it could tear off the roof, break down a wall, or cause other structural damage. It can also fall on your neighbors’ homes, which could lead to significant repair or cleanup costs. If the tree is too close to a utility line, it may rip the line from the ground and cause a power outage for your neighbors. This is a serious safety concern, especially if you live in an area prone to hurricanes. Conclusion If a tree is too close to your home, you may want to remove it. Removing a tree is a big decision, and it’s important to do it safely. Before removing a tree, consider the potential damage it could cause to your home. Also, know the species of the tree so you can identify which trees you can safely remove. If the tree is too large to remove by yourself, consider letting it stay.
By Keenan Riddell November 15, 2022
Is it better to remove stumps or grind them? ‍ When you cut down a tree, the roots remain in the ground. If you leave those roots there, they’ll continue growing and cause problems for other plants or your lawn in the future. If you don’t remove the stump properly, it can also be dangerous for you or anyone using that area of your property. Thankfully, there are several ways to get rid of those pesky stumps that won’t cost you too much time or money. You have two main options: You can either remove the stump manually or grind it. The best way to go depends on a variety of factors. Read on to learn more about both methods and when each is most suitable for removing stumps. Manual stump removal Manual stump removal is the most basic way to get rid of those pesky stumps in your yard. It involves sawing off the top of the stump and then digging out the roots below ground. When you cut off the top of the stump, it won’t be able to take in as much water or nutrients, so it’ll die off more quickly. You can then dig out the stump’s roots with a shovel and be finished. When choosing a saw to cut the stump, it’s best to go with a manual, pruning-type saw that can cut all the way through the stump. Using an electric saw will be much more trouble than it’s worth, as it’ll take a lot longer to go through the stump and be very messy. Manual stump removal is best for stumps smaller than 6 inches in diameter. While it can also be used on bigger stumps, it’s a very labor-intensive and tiring process. Grinding stumps Grinding stumps can be a much quicker and easier way to remove them. While manual stump removal is done with a saw, grinding stumps will use a lawn mower-like device to remove them. When choosing a stump grinder, keep in mind that it’ll need to be able to cut through the wood of the stump. You should also make sure it is powerful enough to go through the stump quickly. Finally, you should make sure it is easy to use so you don’t injure yourself while using it. These machines work by spinning a sharp blade that literally cuts the wood in the stump into pieces. The pieces are then broken down and turned into wood chips. The wood chips can then be easily removed from the soil or left where they fall. Benefits of manual stump removal - Doesn’t cause damage to other plants or the soil - When you grind a stump, the ground around it can become damaged and lose some of its nutrients. - Cheap - Manual stump removal is a much cheaper alternative to using a stump grinder. - Quicker - Manual stump removal is a quicker job than grinding stumps. Drawbacks of manual stump removal - Harder to do - Manual stump removal can be very hard work, especially if the stump is larger than 6 inches in diameter. - Requires a lot of effort - It can be exhausting to remove a stump manually. - Risk of injury - Using a manual saw can cause you to accidentally cut yourself. Benefits of grinding stumps - Doesn’t cause damage to other plants or the soil - The ground is left unharmed and won’t lose as many nutrients as it would if you dug out the stump. - Quicker - Grinding stumps is much quicker than removing them manually. - Won’t risk injuring yourself - You’re unlikely to accidentally cut yourself while grinding stumps. Drawbacks of grinding stumps - Can damage your equipment - Grinding a stump can quickly damage your lawn mower if it’s not powerful enough. Conclusion Removing stumps manually can be a very time-consuming and hard process. You may also risk injuring yourself and damaging your lawn mower if you go this route. - On the other hand, grinding stumps is significantly quicker and easier. However, you may risk damaging your lawn mower and it may also damage the soil around the stump. Ultimately, the best way to deal with stumps is to cut them off at ground level when you’re removing a tree. If you don’t, they’ll just grow back more quickly and be more difficult to remove next time.
By Keenan Riddell November 15, 2022
How long does it take for ground to settle after stump grinding? After trees are removed from a property, the ground can be left uneven. Often, this occurs because roots grew in one direction and not the other. This means that once they’re removed, there may be one end of the property that is higher than the other. Working with ground that is uneven after tree removal can be challenging for many different reasons. It makes it harder to plant new things, build new structures or even just walk around without tripping over roots or rocks hidden under leaves. The good news is that there are solutions to help you work with your uneven ground more easily. One of those solutions is stump grinding. This will cut away the remainder of the tree stump and level out the ground at the same time. Here are some answers to frequently asked questions about stump grinding and how it affects your land afterward: How long does it take for ground to settle after stump grinding? Ground settling after tree removal is a gradual process that can take weeks to complete. The more mature the tree is, the longer it will take for the ground to settle. However, there are a few factors that can also affect the time it takes for the ground to settle. First, the depth of the ground will impact how quickly it settles. The deeper the ground, the longer it will take for it to settle. Another factor is the condition of the ground. Soil that is recently amended or compacted will settle more quickly than soil that has been left alone for a while. Stump grinding leaves deep grooves in the ground that can help speed up the process of settling. It can also create pathways so that water can drain and be pulled up to the surface again. This is why if you ever have to wait months to put a patio or walkway on your property, it can be helpful to wait for the ground to settle first. When is it time to grind stumps instead of pulling them? Grinding stumps instead of pulling them from the ground can help speed up the settling process. It may also be necessary if you are working with particularly large or deep rooted stumps that would be difficult to remove manually. Stump grinding can also make it easier to level out uneven ground. If you want to put in a garden or a walkway, grinding the stump is often a more effective solution than just leaving the ground uneven. There are a few things you can look for to know when it is time to grind stumps instead of pulling them. First, make sure the ground is level and even before you start pulling the stump. This will make it easier and safer to work. Second, be sure to use the right equipment. If you try to pull the stump with equipment that is not designed to do it, it will only make the process more difficult. What happens during the grinding process? Grinding stumps is a great option for removing difficult stumps and leveling uneven ground. During the grinding process, a stump grinder uses a rotating tooth-like blade to chip away the stump. It is usually able to grind stumps that are around five inches in diameter. Once the stump is ground away, the soil is left level and smooth. The stump grinder leaves behind a large amount of wood chips that can be used in the garden or as mulch. It is important to note that stump grinders cannot grind roots below the ground. If you want to level out the ground but you have particularly large roots, you may need to remove them before you grind the stump. Can you plant things right away? Stump grinding is often done in the fall, just before the ground freezes. This means that you may have to wait a few months before you can plant new things in the ground where the stump was removed. If you want to plant things right away, you may need to level out the soil yourself first. You may also want to wait until the ground has settled so that you don’t end up putting your new plants into an uneven area. One thing you can do to help the ground settle more quickly is to add organic matter to it. This will help the ground settle more quickly and make it easier for water to drain. Is there any way to hurry the settling process? The settling process of ground can be expedited by compacting or tilling it. If you want to settle your ground as quickly as possible, compacting or tilling the soil is a great option. Compacting the soil will make it thinner and help it settle faster. Be careful when compacting the soil, however. You don’t want to compact it too much or else you will limit the amount of nutrients your soil can absorb. Tilling your ground will help the soil settle and make it better for new plants. It is important to note that tilling your soil in too early can cause you to lose some of the nutrients you added to it with the addition of organic matter. Conclusion Stump grinding is a useful and effective method for removing trees from your property. It makes the ground level out again and prepares it for new plants. There are a few factors to consider before grinding stumps, such as the stump’s size and the condition of your soil. Be sure to wait until the ground is level before removing the stump and use the right equipment. Once the stump is removed, the ground will settle. This process can take weeks depending on the maturity of the tree and the condition of the soil. You can expedite the settling process by compacting or tilling the soil.
By Keenan Riddell November 15, 2022
How do you treat soil after stump grinding? ‍ After removing a tree stump, the ground underneath is often left with large amounts of soil and other debris. To get the area ready for new plants or grass, you’ll need to add new soil, compact the dirt and remove rocks, twigs and other unwanted items. There are many different ways to go about this process, but most involve removing as much of the unwanted items as possible while also adding necessary nutrients back into the ground. This article will explain how to treat soil after stump grinding by covering all the essential details for successful post-stump grinding care. Read on to learn more! What is involved in treating the soil after stump grinding? Treating soil after stump grinding involves many different steps. You’ll want to remove rocks and other unwanted items, as well as add nutrients that the ground may be lacking. You may also want to add new soil or topsoil to the area, which can be done in a few different ways. First, you’ll want to clean out the stump area as much as possible. Use a shovel to remove any rocks and large pieces of dirt that may be left in the ground. Then, you can use a rake to break up any remaining pieces of stump and other debris. Next, you’ll want to add nutrients to the ground. The best way to do this is by fertilizing the ground with a fertilizer designed for use on soil. Take care to read the fertilizer label to determine the right amount to add. Finally, you can add new soil or topsoil to the area. The best way to do this is by using a John Deere tree stump grinder. Simply pour the new soil into the ground, then use the stump grinder to incorporate it into the existing ground. Replacing the soil after stump grinding After stump grinding, you may need to replace the soil that was removed from the area. This is often the case if you’re clearing out an area for a new lawn or garden. It’s important to add the right type of soil to the area, however, or you could end up with poor growth and poor soil quality. To replace the soil, you can either buy a bagged soil mix or you can use topsoil from another area. If you choose to use bagged soil, be sure to choose the right type for your area. For example, if you live in an area with sandy soil, you do not want to use a soil mix designed for clay. For topsoil, you can ask a local arborist or soil company if they have any soil they’d like to get rid of. You can also check with local construction companies to see if they have any leftover soil they’d like to get rid of. Adding fertilizer to the ground After removing the rocks, twigs and other debris from the ground and cleaning out the stump, you’ll want to add fertilizer to the area. There are many different types of fertilizer that you can use, but you’ll want to choose one that’s designed for use on soil. Fertilizer is an important part of post-stump grinding care because it can help replace the nutrients that were removed from the ground when you removed the stump. When adding fertilizer to the ground, it’s important to apply the right amount. You should also know when to apply the fertilizer, so you can get the best results. For example, if you want to use a fertilizer designed to promote root growth, you should apply it before planting your new plants. If you want to use a fertilizer that promotes top growth, you should apply it after planting. Some fertilizers can be applied at any time, but you should check the label to be sure. Mixing in organic matter Organic matter is another important part of post-stump grinding care. It’s often best to mix in organic matter before you add the fertilizer, but you can also do both at the same time. There are many different types of organic matter you can use, but you’ll want to choose something that’s locally sourced. Mixing in organic matter can help provide added nutrients to the ground as well as help it retain water better. It can also help prevent weeds from growing in the area. When mixing in organic matter, you’ll want to make sure it’s broken up into small pieces. You can use a shovel or another tool to do this. You can also mix in organic matter while you’re adding fertilizer. Rotating and tilling the ground Another important part of post-stump grinding care is rotating and tilling the ground. When you rotate the ground, you’re turning it over, so the top soil is mixed with the bottom soil. This helps bring more nutrients from the bottom soil up to the surface, so your plants have plenty of nutrients to grow. It can also help prevent problems like root rot, which is when the roots of your plants grow in the wrong soil. It can also help control weeds by preventing them from getting a good start in the ground. You can rotate the ground by hand if you like, but it’s easier to use a rototiller. A rototiller is a tool that breaks up the soil and rotates it at the same time. When tilling the ground after stump grinding, you want to till the ground down about 6 inches or so. This is a good depth to till the ground, but not too deep where you end up bringing too much soil to the surface. How to add new soil after stump grinding There are a few different ways to add new soil after stump grinding. You can use a John Deere tree stump grinder to pour the new soil in and mix it with the old soil. This works especially well when you use clean fill soil, which is often used to fill in old or eroded areas. You can also use a backhoe to dig out an area and then fill the hole with new soil. This method is best when you have a large area to fill. Finally, you can use a Bobcat to pour the new soil into a wheelbarrow, then wheel it over to the area and pour it out. When you add the new soil, you’ll want to make sure you get it mixed in well with the old soil. You can use a shovel or other tool to do this. You can also use a rototiller to help mix the new soil in, if you used that tool to till the ground. Conclusion After removing a tree stump, you’ll need to treat the soil to get the area ready for new plants or grass. There are many different ways to go about this process, but most involve removing as much of the debris as possible while also adding nutrients back into the ground. First, you’ll want to clean out the stump area as much as possible. Then, you can add nutrients to the ground by using a fertilizer designed for soil. Finally, you can add new soil or topsoil to the area using a John Deere tree stump grinder or another method.
By Keenan Riddell November 15, 2022
Can you plant a tree where one was removed? ‍ When we think of conservation, we often think of saving animals or plants from danger. But what about saving a piece of land in danger? Many natural areas are being destroyed at an alarming rate for several reasons. Some are logged for timber, some are mined for minerals and some are clear-cut for building materials. In fact, the World Wildlife Fund estimates that an area the size of New York City is destroyed every single minute. To help prevent further deforestation, planting trees where they were removed is an excellent way to conserve land and its native inhabitants. Here are a few ways you can help with tree planting efforts wherever you live: Check your local area for tree planting opportunities First, find out where deforestation is most pressing. A great resource to use is the Global Forest Watch, which maps forest loss in real time by logging company and country. You can also look up deforestation statistics by state or country. These statistics can help you decide where you’d like to help with tree planting efforts. From there, you can contact your local government to see if there are any local initiatives. After all, planting trees is a great way to contribute to your community and help the environment. Plant a tree yourself First, find a place to plant a tree. In many areas, you can plant a tree in a park, on school grounds, or in your own backyard. Tree planting in public spaces, such as parks, is a great way to get community members involved and create a more beautiful and healthy environment. Tree planting in your backyard is perfect if you have children who are interested in gardening. Join an organisation that plants trees Find an organisation that plants trees and volunteer your time. There are many environmental and conservation organisations that plant trees. Great examples include the National Wildlife Federation, United Nations Environment Programme and the World Wildlife Fund. Besides planting trees, these organisations also provide education about how to take care of new trees, why they are important, and how you can help them thrive. Help care for trees already planted If you want to help care for trees already planted, there are a few things you can do. Some organisations that plant trees ask volunteers to help water and weed trees until they are able to grow and survive on their own. If you are gardening in your backyard and have just planted a tree, you can also help prevent weeds from growing around your young tree by watering the area regularly and placing mulch around the trunk and roots. Conclusion There are many ways to help prevent deforestation. Planting trees near your home or in a park, joining an organisation that plants trees, or even helping care for trees planted in the past are easy ways to help keep forests healthy and vibrant. When you plant a tree, you’re not only saving it from danger, but you’re saving the wildlife that lives in and around it. You’re helping prevent soil erosion and improving air and water quality. Besides being a great way to help the environment, planting trees is also an excellent way to spend time with family and friends. It can also be a great activity to do with children. With so many benefits, it’s clear that tree planting is an important way to help the environment. So next time you are looking for a way to contribute, plant a tree!
By Keenan Riddell November 15, 2022
How do you stop a tree from leaning over your house? ‍ Unless you have a very large house, there’s probably no way to avoid a tree leaning over it. You can take various measures to prevent or mitigate the risk, but that’s about as far as you can go without rebuilding your home from scratch. Because of this, you will need to make sure that the tree is safe and won’t fall on your house at some point in the future. There are a few ways in which you can do this, though they depend rather heavily on the kind of tree in question. If you keep reading, we will tell you everything you need to know before planting a leaning tree by your house. Assess the Risk Before you do anything, you will want to understand the risk posed by the leaning tree. This will dictate how aggressively you need to treat the problem, and it will affect how much work and money you need to put into making things safe again. There are a few ways to assess the risk. First of all, you need to get a sense of how far the tree is leaning. Then, you need to understand why it might be leaning. You will also want to get a sense of how much of a risk the tree represents. This can be tricky, but there are a few indicators you can look for. Be Careful When Planting by Walls If the tree is leaning towards a wall, you will need to be extra careful when planting a tree nearby. As the tree grows, it could become destabilized and fall towards the wall. This is more likely if you put the tree too close to the wall. One way to get around this is to build a wooden trellis next to the wall. Then, you can plant the tree away from the wall on the other side of the trellis. This way, the trellis will catch the tree if it starts to fall. If you have a brick wall, you may want to consider attaching a metal bracket to the wall to catch the tree if it comes loose. Monitor the Tree’s Health Before you do anything else, you will want to make sure the tree is healthy. A leaning tree may be growing towards some obstacle that prevents it from standing upright. If the problem is a lack of sunlight, you can solve the problem by re-positioning the tree. If the problem is an obstacle like a building, you can solve the problem by removing the obstacle. In both cases, you may be able to fix the problem by adjusting the tree. You can also use this opportunity to prune the tree. Pruning can help the tree grow straighter and be less of a risk to your house. Support With Strings (Tie-backs) If the leaning tree is young, you may be able to support it with strings. This is especially effective if a tree is leaning towards your house. To do this, you will want to wrap a strong string around the tree in the direction it is leaning. Then, you will want to tie the string to an immovable object nearby. This will give the tree something to lean towards and will help it to grow upright. The support will only be needed for a few years, after which the tree should be strong enough to stand on its own. The main issue with tie-backs is that they can be difficult to remove without damaging the tree. Therefore, you should only use this method as a last resort. Support With Bracing (V-bridges or X-bridges) If the leaning tree is large enough or if the tree is too young to use string supports, you may need a more permanent solution. You can do this by building a V-bridge or an X-bridge. A V-bridge is a structure that goes between two trees and attaches them to each other. An X-bridge is a structure that supports a single tree. Both of these structures can support a large amount of weight and can be built from materials you can get at a hardware store. They will, however, cost a bit of money and will take some time to build. If you are not experienced in carpentry, you may want to hire a professional to do the work for you. This may be expensive, but it is better than letting a large tree fall on your house. Conclusion You will want to take care when planting a new tree so that it does not end up leaning towards your house. If you do, however, you can use a few simple techniques to prevent or mitigate the risk. If the tree you already have is leaning, you will want to assess the risk and make sure the tree is healthy. Then, you can build a V-bridge or an X-bridge to support the tree when it is too young for string supports.
More Posts